
Monterey Park Wood Flooring has handled wood floor refinishing in Monterey Park, CA for more than 20 years, serving surrounding cities including South San Gabriel, East Los Angeles, Alhambra, Montebello and Rosemead. A full refinish takes an oak, maple or engineered floor down to fresh wood, repairs what is damaged, and seals it with a new stain and finish. Done well, it makes a decades-old floor look close to new without replacing a single board that can be saved.
We do not sand first and ask questions later. Every refinishing quote starts with moisture meter readings, a check of how much wood is left above the tongue or in the engineered wear layer, a look for loose boards, soft spots and old termite damage and, where there is a crawl space, a trip under the house. A sloping or bouncy floor is fixed at the framing before we touch the surface, because sanding cannot correct a structural problem, it only hides one for a while.
Our quotes are written room by room and item by item. Sanding, stain, finish coats, board repairs and stairs each get their own line, so you can see where the cost goes and decide what to include. You also get a schedule showing when each room will be off-limits and when it opens again.
Residential and Commercial Wood Floor Refinishing
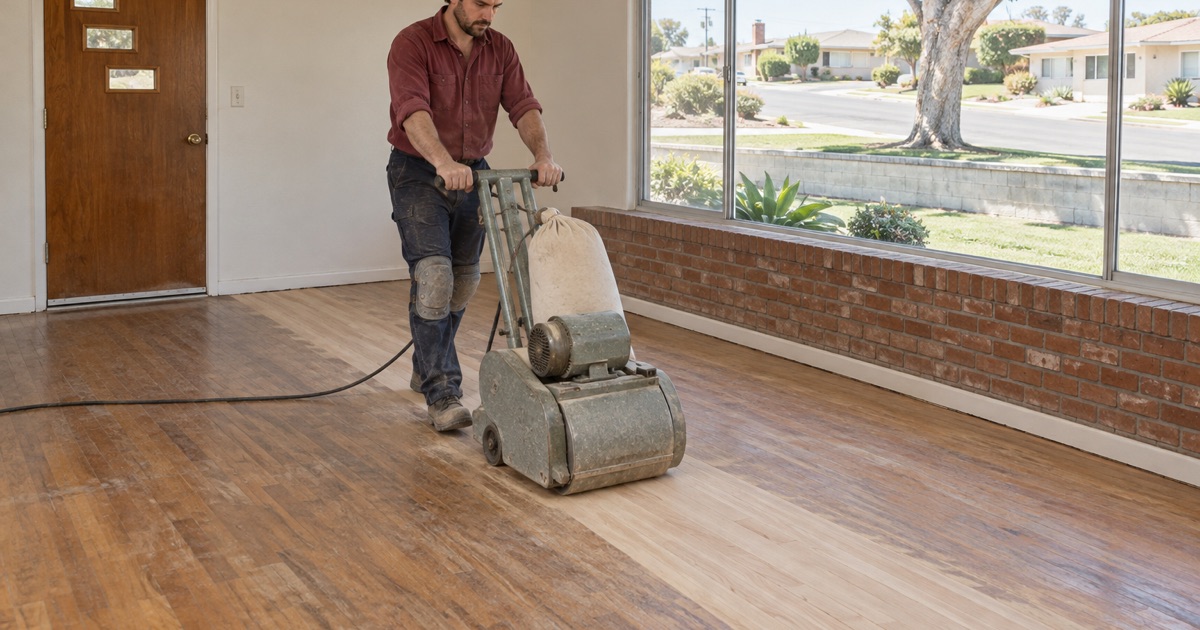
Refinishing Original Oak in Older Homes
Many of the floors we refinish around Monterey Park are original red or white oak laid when the house was built, sometimes under carpet for decades. That wood is often in better shape than owners expect, but it may already have been sanded two or three times, and old paint on baseboards can predate 1978. We confirm the build year and follow lead-safe work practices under the EPA Renovation, Repair and Painting Rule where they apply.
Original floors also tend to carry old repairs, patched heating vents and face-nailed boards near walls. We reset or replace those before sanding so the new finish is laid over a sound, even surface rather than over problems that will show through the moment the stain goes on.
Rental Units, Condos and Townhomes
Rental floors get refinished on a tight turnover schedule, and landlords need paperwork as much as a clean floor. We plan the sanding and a fast-drying waterborne finish to fit the gap between tenants, and our invoices separate normal wear from damage so they can be attached to a security deposit itemized statement.
In condos and townhomes the association’s rules come first. We check work hours, noise limits and any restrictions on common hallways and elevators before scheduling, and we protect shared areas while equipment and finish materials come and go.
Offices, Shops and Restaurant Floors
Commercial wood floors take heavier traffic, rolling chairs and grit from the street, so they wear in lanes and around doors faster than a living room. We refinish them after hours or over a weekend so the business can keep running, and we usually recommend a commercial-grade finish with an extra coat for the traffic it will see.
For a restaurant dining room or a retail floor we also plan around fixtures that cannot move, working in sections and feathering the finish at the edges. The goal is a floor that is open for business on Monday morning, not one still curing when customers walk in.
What a Full Hardwood Refinish Includes
Board Repairs and Replacements Before Sanding
Before any sanding, damaged boards are cut out and replaced with matching species and width, woven into the existing rows so the end joints stay staggered. This is when we deal with deep pet urine stains, black water stains, termite damage and cracked or split boards. Doing the repairs first means the whole floor, old and new wood together, is sanded and finished as one surface.
We also fix squeaks and loose boards from below where the framing is reachable, and reset any boards lifting at a threshold or a heating register. Those are small jobs on their own but expensive ones to come back for after the finish is down.
Sanding to Bare Wood Without Sand-Through
A full refinish uses a drum or belt sander for the field, an edger along the walls and a buffer or orbital sander to blend the passes. We work through a sequence of progressively finer abrasive grits, removing only as much wood as the floor needs to reach clean, flat boards. Taking too much off, especially on a floor already sanded before, risks sand-through down to the tongue.
Between grits we check the surface under a raking light for drum marks, chatter marks and swirls from the coarser paper. Those flaws are nearly invisible on raw wood and glaring once stain and finish go on, so we catch them before, not after.
Engineered Floors and Their Limits
Engineered hardwood can be refinished only if the wear layer is thick enough to take a sanding. We measure it before promising anything, usually at a floor vent or a transition strip. A thicker wear layer can be fully sanded; a thin veneer can only take a screen and recoat, and trying to sand it risks exposing the plywood beneath.
Wire-brushed or hand-scraped engineered floors add another limit, since a full sanding removes the texture. For those we often recommend a thorough cleaning and a recoat instead, which refreshes the finish while keeping the character you paid for.
Stain Colors, Sheen and Finish Choices
Choosing and Testing a Stain Color
After the final sanding pass we apply several stain colors in patches directly on your floor, including a natural patch with finish only. You look at them in the room’s own light, at the times of day you use it most, before we commit to the whole floor. Red oak, white oak and maple each take the same stain very differently, and a chip in a showroom tells you little about your own boards.
When a darker, more even color is wanted, water popping raises the grain so it takes stain more uniformly. On blotch-prone maple or birch we may use a sealer coat or a gel stain instead, or suggest a natural finish that avoids blotching entirely.
Waterborne, Oil-Modified and Hardwax Oil Finishes
Waterborne polyurethane dries clear, keeps a light floor light, and allows faster recoats, which suits occupied homes and rentals. Oil-modified polyurethane gives a warmer amber tone that deepens over time. Hardwax oil penetrates the wood for a matte, natural look and can be touched up in one spot, but it needs more regular maintenance than a film finish.
Sheen level matters as much as the product. Matte and satin hide scratches and dust far better than semi-gloss or gloss, which is why most households we work with choose one of the two lower sheens for main living areas.
Finishes Legal in the South Coast Air District
Monterey Park falls within the South Coast Air Quality Management District, where Rule 1113 limits clear wood coatings to 275 grams per liter of volatile organic compounds, with separate limits for stains. Some solvent-heavy products sold nationally cannot legally be applied here, and a contractor working from out-of-area habits may not know that.
We select compliant stains, sealers and finishes before the job starts, so the product on your floor is one that meets local air rules and is supported by its manufacturer for the use. That also keeps the odor during the job lower than many owners expect.
Our Step-by-Step Wood Floor Refinishing Process
Step 1: Assessment and Written Quote
We measure the floor, take moisture readings, check the wear layer or remaining wood, look for structural and termite problems, and confirm the build year. You receive an itemized quote and a room-by-room schedule.
Step 2: Preparation and Repairs
We move furniture as agreed, seal doorways and returns, remove shoe molding or quarter round where needed, and complete board replacements and squeak repairs so the floor is sound before sanding.
Step 3: Sanding and Inspection
The floor is sanded through the full grit sequence, edged and blended, then vacuumed and inspected under raking light. Any drum or chatter marks are corrected before stain goes on.
Step 4: Stain Samples and Finish Coats
You approve a stain color from samples on your own floor. We then apply stain or sealer and the finish coats, lightly abrading between coats so each one bonds to the last.
Step 5: Cure Schedule and Handover
We reinstall trim, walk the floor with you, and leave written dates for socks, furniture and rugs based on the finish manufacturer’s cure time. You also get simple care instructions, including which cleaners are safe for the finish we used.
- 20+ Years on Wood Floors
- Itemized Written Quotes
- Lead-Safe Checks on Pre-1978 Homes